Here you can find information regarding the assembly of the Chevy Impala front end. In this guide we will cover the
essential repairs for the front end of this vehicle. Included within these repairs
is the inner and outer tie rod removal and change, the front wheel hubs installation, ball joint removal and
installation, the upper and lower control arms, and the front shock installation. Along
with the repair procedures we also include the corresponding bolt torque specs for each fastener involved. These
guides are intended to assist in each procedure to help diyers with the job.
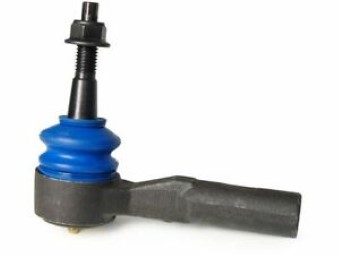
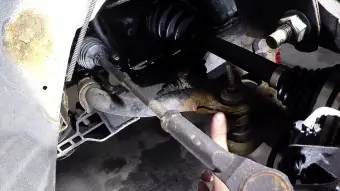
Chevy Impala Tie Rod Change/Removal
To install a new tie rod on a Chevy Impala you must first remove the old one from the vehicle. This can be
done by raising the vehicle up by either the use of a floor jack or a vehicle hoist.
Once the vehicle is in the air you can remove the corresponding tire for the side that you want to change the
tie rod on. Once the tire is off you can now access the old tie rod and remove it for replacement. On this vehicle the tie
rod attachs to an inner tie rod that screws directly into the steering rack. If replacing the entire tie rod assembly you can tighten the inner
tie rod up toi 74 ft-lbs using a special holding tool. The outer tie rod endlink can be torqued down to the steering knuckle using 18 ft-lbs and then
an additional 90 degree turn.
Be sure to install a cotter pin if necessary as this will prevent the nut from loosening up under extreme circumstances.
Chevy Impala Outer Tie Rod End Torque Spec : 18 ft-lbs + 90°
Chevy Impala Inner Tie Rod Torque Spec : 74 ft-lbs
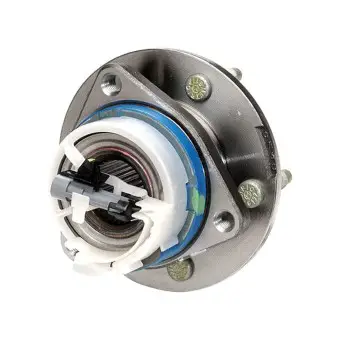
Front Wheel Hub Installation
The front wheel hub on the Chevy Impala tightens down to the steering knuckle through the use of 3 bolts. In order to remove the
old part from the vehicle you will need to jack your car up and remove the wheel on the side you are working on. From here we can then begin to
remove the braking system by taking off the caliper and brake rotor. Once the braking system is off you can remove the center axle nut which holds
the front cv axle to the wheel hub. This nut will be rather tight so I recommend using an impact or some leverage. With the center axle nut removed
we can now move to the backside of the steering knuckle and remove the 3 bolts which hold the wheel hub to the knuckle. The easiest way to access these
bolts is to turn your steering wheel to one direction and remove a bolt and then the other to remove the others. Once the bolts have been removed
you can remove the old hub from the vehicle. It is common for it to be corroded onto the knuckle so you may need to use a hammer and some penetrating fluid
in order to make it easier. Once off you can clean up the surface and install the new part on the knuckle by hand tightening up the bolts. Be sure
to also install the brake dust shield while installing the new hub. Once hand tightened you can torque the hub bolts down to 85 ft-lbs. From here we
can begin to reinstall the cv axle into the new hub and hand tighten down the axle nut. The braking system can now be reinstalled and torqued down. Be
sure to check out the brake portion of this vehicle accessible above through the brake link. After the brakes and other components have been installed
we can reinstall the wheel and then lower the vehicle to torque down the center axle nut. I like to tighten them down this way to ensure the wheel
does not spin instead of the nut turning. Torque the center axle nut to 159 ft-lbs.
Chevy Impala Front Axle Nut Torque Spec : 159 ft-lbs
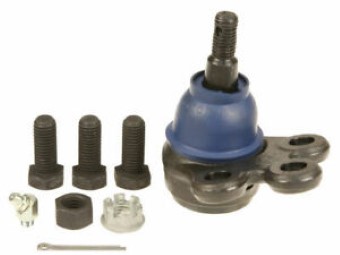
The Chevy Impala has only one set of front ball joints being the lower ball joints. The upper portion of the suspension is maintained
by the strut assembly. The lower ball joint on this vehicle is a commonly replaced part as takes most of the road wear when traveling over bumps
and surfaces. For this reason its always a good idea to check its condition whenever working on your vehicle. In order to replace the lower ball joint
you must replace the entire front lower control arm. To start please remove the wheel from the side you want to replace.
With the wheel removed you can then begin to loosen the pinch bolt which holds the ball joint to the steering knuckle.
Once removed you can then remove the 3 bolts which hold the lower control arm to the vehicle frame and then remove the old control arm.
To install the new lower control arm you can start by placing the new part into the location of the old one and hand tighten up the frame fasteners.
Next you can lube up the lower ball joint shaft and lightly tap it into the steering knuckle. Once it is far enough into the knuckle you will be able
to look through the pinch bolt hole and see the bump where the bolt will go. Insert the lower ball joint pinch bolt and tighten it down to 37 ft-lbs
and then an additional 30 degree turn. From here we can torque down the lower control arm frame bolts to 37 ft-lbs with an additional 90 degree turn.
Once all of the bolts have been torqued you can reinstall the vehicle wheel and go for a test drive.
Chevy Impala Lower Control Arm Frame Bolts Torque Spec : 37 ft-lbs + 90°
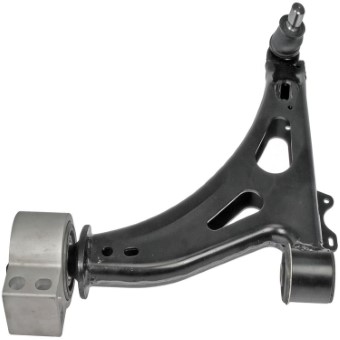
Front Control Arm Installation
Lower Control Arm
The Chevy Impala has only one set of front control arms being the lower control arms. The upper portion of the suspension is maintained
by the strut assembly. The lower ball joint on this vehicle is a commonly replaced part as takes most of the road wear when traveling over bumps
and surfaces. For this reason its always a good idea to check its condition whenever working on your vehicle. In order to replace the lower control
arm on this vehicle please start by removing the wheel from the side you want to replace.
With the wheel removed you can then begin to loosen the pinch bolt which holds the ball joint to the steering knuckle.
Once removed you can then remove the 3 bolts which hold the lower control arm to the vehicle frame and then remove the old control arm.
To install the new lower control arm you can start by placing the new part into the location of the old one and hand tighten up the frame fasteners.
Next you can lube up the lower ball joint shaft and lightly tap it into the steering knuckle. Once it is far enough into the knuckle you will be able
to look through the pinch bolt hole and see the bump where the bolt will go. Insert the lower ball joint pinch bolt and tighten it down to 37 ft-lbs
and then an additional 30 degree turn. From here we can torque down the lower control arm frame bolts to 37 ft-lbs with an additional 90 degree turn.
Once all of the bolts have been torqued you can reinstall the vehicle wheel and go for a test drive.
Chevy Impala Lower Control Arm Frame Bolts Torque Spec : 37 ft-lbs + 90°
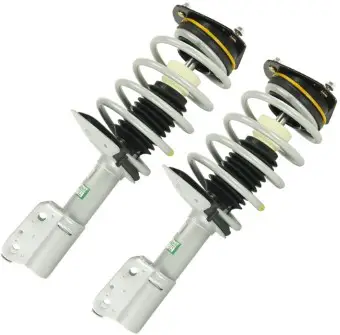
Front Strut Installation
To replace the front struts on the Chevy Impala you will have to first remove the tire on the side of the vehicle in which you intend to replace.
Once the tire is off you can then remove the 2 lower strut bolts which hold the strut assembly to the steering knuckle. Once these bolts have been removed
you can move to the upper portion of the strut. From under the hood of the vehicle you can access the single nut that holds the strut up to the vehicles frame.
Once these are removed the entire strut assembly can be removed from the vehicle. To install a new strut simply place the new part up into the location as the old
one and begin to hand tighten the upper fasteners. Once tightened you can then hand tighten the lower strut bolts. You may need to tap the bolts into place but be
careful not to damage the bolts threads. Once all fasteners have been hand tightened you can begin to torque down the bolts. The upper nut needs to
be torqued down to 48 ft-lbs. The 2 lower strut bolts can be torqued down to 90 ft-lbs.
The front swaybar on the Chevy Impala consists of a series of brackets that hold it to the frame of the
vehicle and a couple of endlink nuts that fasten it the the outer side of the car. To remove
the swaybar you will need to jack up the front of the vehicle and remove both the endlink nuts as well as the
brackets. To install the new swaybar you will need to move it back into the place as the old one
and torque the endlink nuts to 48 ft-lbs and then torque the bracket bolts to 37 ft-lbs as well.
Chevy Impala Front Swaybar Bracket Torque Spec : 37 ft-lbs
Chevy Impala Front Swaybar Endlinks Torque Spec : 48 ft-lbs