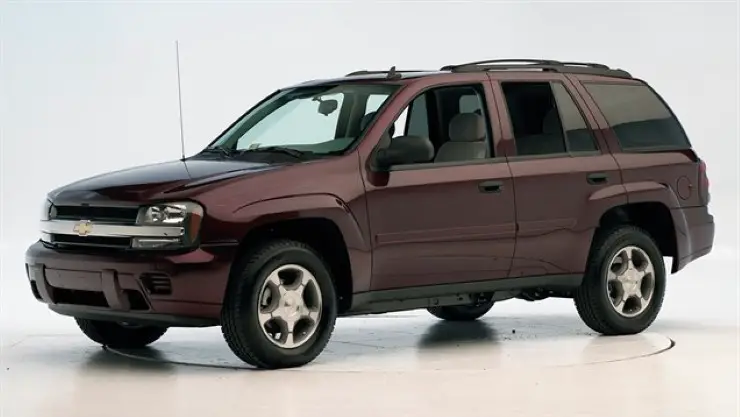
Here you can find information regarding the assembly of the Chevy Trailblazer front end. In this guide we will cover the
essential repairs for the front end of this vehicle. Included within these repairs
is the inner and outer tie rod removal and change, the front wheel hubs installation, ball joint removal and
installation, the upper and lower control arms, and the front strut installation. Along
with the repair procedures we also include the corresponding bolt torque specs for each fastener involved. These
guides are intended to assist in each procedure to help diyers with the job.
Chevy Trailblazer Tie Rod Change/Removal
To install a new tie rod on a Chevy Trailblazer you must first remove the old one from the vehicle. This can be
done by raising the vehicle up by either the use of a floor jack or a vehicle hoist.
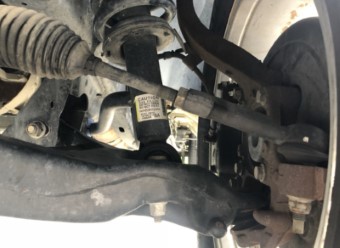
Once the vehicle is in the air you can remove the corresponding tire for the side that you want to change the
tie rod on. Once the tire is off you can now access the old tie rod and remove it for replacement. On this vehicle the
tie rod is apart of an entire rod system which controls the steering of the vehicle. If any of the steering rods are loose
be sure to replace them appropiately. The outer tie rod itself connects with another inner portion of the rod through the use
of an inner tie rod. This inner tie rod screws into the power steering rack and can be torqued down to 74 ft-lbs.
Be sure to inspect and measure your old tie rods so that the new ones can be installed
correctly. Whenever steering components are changed I recommend having an alignment done after the job to ensure the vehicle is in good
functional condition. When putting the tie rod onto the vehicle the tie rod end nuts get tightened down to 42 ft-lbs. Be sure to install new
cotter pins to ensure that vehicle safety is maintained.
Chevy Trailblazer Outer Tie Rod End Torque Spec : 42 ft-lbs
Chevy Trailblazer Inner Tie Rod Torque Spec : 74 ft-lbs
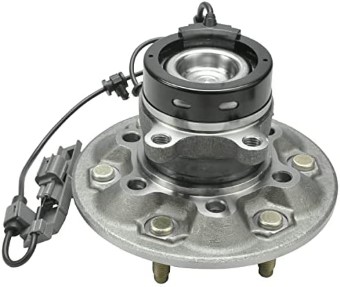
Front Wheel Hub Installation
The front wheel hub on the Chevy Trailblazer is different depending on whether the vehicle is 4WD or RWD. On rear wheel drive models the
front wheel bearing gets tightened down to the steering knuckle but it does not have a center axle nut. The AWD wheel hub wil have a hole for the cv axle
to go through it and then be tightened down using a giant nut. If you are replacing
the bearing on a RWD model you will want to start with jacking up your vehicle and removing the tire on the side you wish to replace. From here we can move
to the braking system and remove the caliper so that the rotor can then be taken off of the vehicle. With the braking system removed we can now gain
better access to the front wheel hub and its bolts which are located behind it. Move the steering wheel to one side and then reach in from behind the
knuckle to remove the 3 bolts which hold the wheel hub in. Once you get one side done you can move the steering wheel the other direction. Once all
of the bolts have been removed you can lightly hammer on the old wheel hub to get it to come loose from the knuckle. Once loose the old hub should
easily move away from the vehicle. Be sure to unplug the ABS or wheel speed sensor if attached. The new hub can now be placed into position and you can
hand tighten the 3 bolts. Once all of the bolts have been hand tightened you can begin to torque them down to 77 ft-lbs. From here if you have a RWD model
you can reassemble the braking system and wheel and be done. If you have a 4WD model however you will need to install the cv axle into the hub and tighten down
the center axle nut to 103 ft-lbs. After torqueing you can install the dust cap and reinstall the rest of the wheel assembly. For the braking system be sure
to check out the brake webpage which can be found using the button on the top of the page.
Chevy Trailblazer Front Axle Nut Torque Spec : 103 ft-lbs
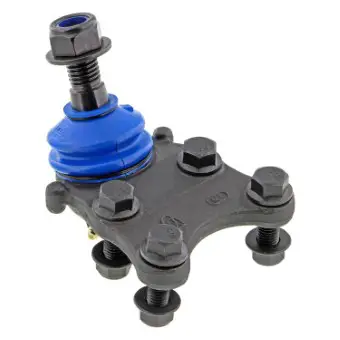
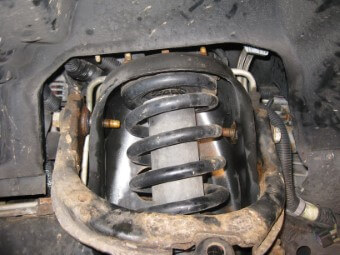
The Chevy Trailblazer has two sets of front ball joints being the upper and lower ball joints. The most common one
for replacement is the lower ball joint which on this vehicle is attached to the lower control arm. To install a new lower ball joint
you will need to either press out the old ball joint or replace the entire control arm as an assembly. If you choose to replace the entire arm
be sure to check out the control arm section on this webpage. If you choose to press out the ball joint you will need a ball joint pressing tool
which looks like a giant c clamp and comes with many different pressing plates. Find the correct sized plate and press out the old ball joint
and then press in the new ball joint. Once you can the new lower ball joint in place you can reinstall the steering knuckle to the lower control arm
and torque down the lower ball joint nut to 79 ft-lbs. The upper ball joint is very similar to the lower ball joint in that it will need to be pressed
out of the steering knuckle in order to replace it. Once you can the new upper ball joint in place and everything is ready to go be sure to torque down
the upper ball joint pinch bolt to 30 ft-lbs.
Chevy Trailblazer Upper Ball Joint to Arm Nut Torque Spec : 30 ft-lbs
Front Control arms Installation
Lower Control Arm
On the Chevy Trailblazer there are two control arms being the upper and lower control arms. The most common for replacement is the
lower control arm mainly because it contains the lower ball joint and that wears out with driving usage. To start removing the lower
control arm you will need to remove the 2 frame bolts which hold the control arm to the vehicle. With those removed you can then remove the
steering knuckle bolt along with the lower ball joint nut. From here the lower control arm can be removed from the vehicle and replaced with
a new part. For the new part the lower control arm front frame bolt gets torqued down to 195 ft-lbs. The rearmost frame bolt gets torqued down to 170 ft-lbs.
From here you can install the bracket mounting nuts and torque them down to 96 ft-lbs. The lower ball joint nut gets tightened down to 79 ft-lbs.
The upper control arm on this vehicle is much simpler and quicker than the lower control arm. To install a new upper control arm simply remove the pinch
bolt for the upper ball joint and then remove the joint from the arm. Now remove the 2 frame bolts that hold the arm to the vehicle frame. To install
a new upper control arm simply place the new part into its location and torque down to frame bolts to 108 ft-lbs. From here we can install the ball joint and
torque down the pinch bolt to 30 ft-lbs.
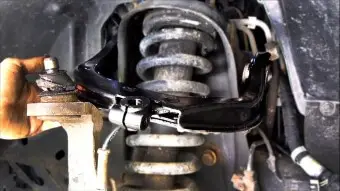
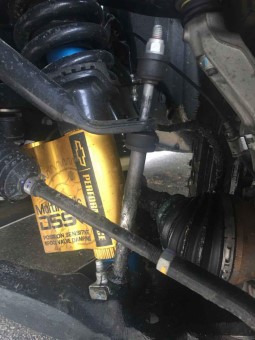
To replace the front struts on the Chevy Trailblazer you will need to lift the vehicle up into the air and start by removing the tire on the side you want to replace.
With that removed we can now remove the bolts and nuts
that hold the strut to the vehicle frame and steering knuckle. Starting with the lower bolt we simply remove the nut from one side and then
lightly guide the bolt through the hole on the steering knuckle. Be sure not to ruin any of the bolt threads if you end up using a hammer to
tap it out. With the bottom bolt removed we can move to the 2 upper nuts which hold the strut to the vehicles frame. Once off the old strut should be removable
from the vehicle. To install the new strut simply place it into the location as the old one and begin to hand tighten up the upper nuts and the lower bolt.
Once all the fasteners have been hand tighten you can torque down the strut upper nuts to 50 ft-lbs. The lower bolt can be torqued down to 90 ft-lbs.
The front swaybar on the Chevy Trailblazer consists of a series of brackets that hold it to the frame of the
vehicle and a couple of endlink nuts that fasten it the the outer side of the car. To remove
the swaybar you will need to jack up the front of the vehicle and remove both the endlink nuts as well as the
brackets. To install the new swaybar you will need to move it back into the place as the old one
and torque the endlink nuts to 13 ft-lbs and then torque the bracket bolts to 37 ft-lbs as well.
Chevy Trailblazer Front Swaybar Bracket Torque Spec : 37 ft-lbs
Chevy Trailblazer Front Swaybar Endlinks Torque Spec : 13 ft-lbs